Fantastic Voyage - Laying Out UV's
Spray Can Prop
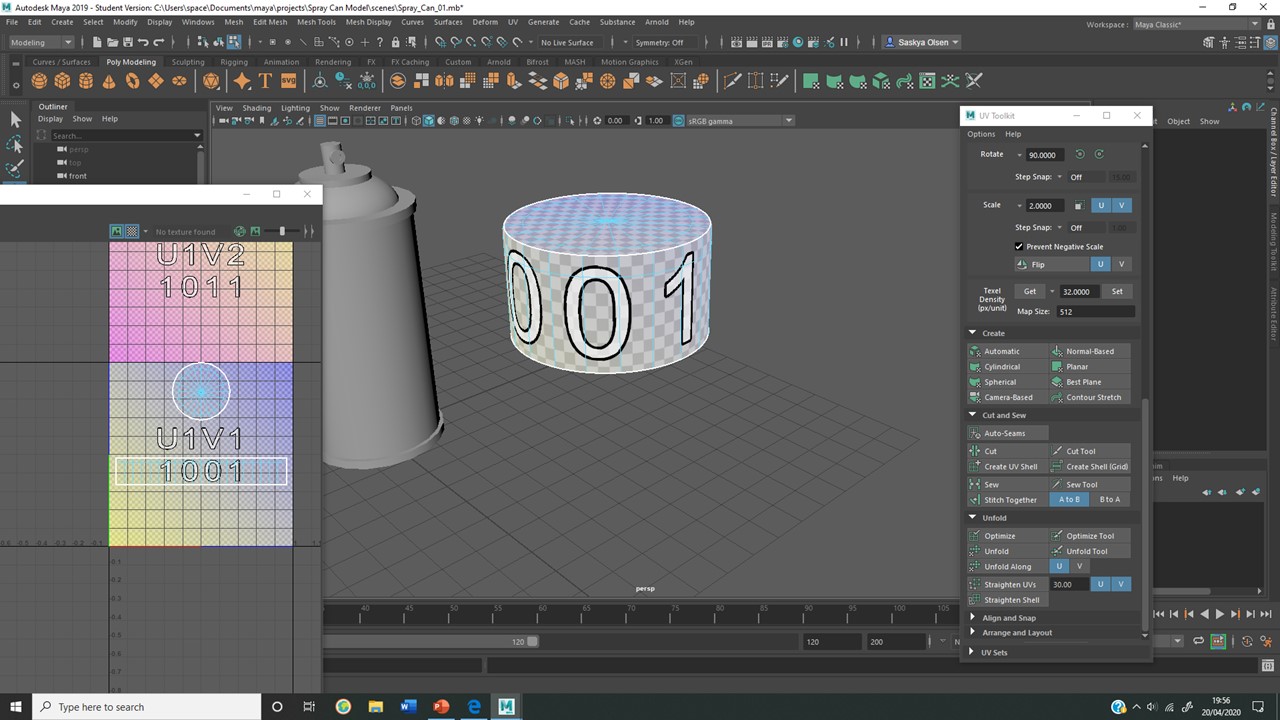
I used a coloured grid with each UV
Mapping process to help identify problematic seam areas. In this example, it
helped me notice distortion on the seam line.
I was able to fix the problem by removing
the two ends of the cylinder, and then deleting the extra geometry that
supported these surfaces.
On small areas of the model, I wasn’t
worried about visible seams and focused on removing distortion.
As I continued to Map UV’s, I learnt
tricks for reoccurring problems; use the scale tool to resize the net if the
grid texture reveals distortion.
Train Model
I decided to separate the components on
my train as
only the side and front will be visible. This ensures that both areas are as
clean as possible.
Re-scaling the wheel’s faces helped fix
any stretching and distortion.
Using methods learnt in an online ‘UV
Masterclass’, I duplicated one wheel to recycle the correct UV’s.
I Re-used the wheels again on the secondary train
carriage.
Used the same principles
on
the carriage body, split the UV’s into separate components to keep the required faces
crisp.
This component (attaches carriages
together) is not visible,
but good practice
to UV map.
Tree Model
This model was very ambitious to UV map.
I Tried to make cuts in hidden areas, not seen by the camera, but this was
unsuccessful once unfolded.
Manually cutting seams was unsuccessful,
I found the ‘planar’ tool best for this tree model.
The Ranger
For the shirt, I used the Cylindrical
unfold setting with additional cuts along the sleeves. I'm not concerned about
these seams as real shirts have similar material margins.
I made sure to create cuts in discrete
areas.
UV mapping the character’s legs was
surprisingly challenging, but cutting off the feet helped prevent texture
stretching.
Backpack straps help to disguise any
imperfections in the shirt.
I decided to UV the character’s skin, but
I plan to use a standard Maya material for this element of the model.


Comments