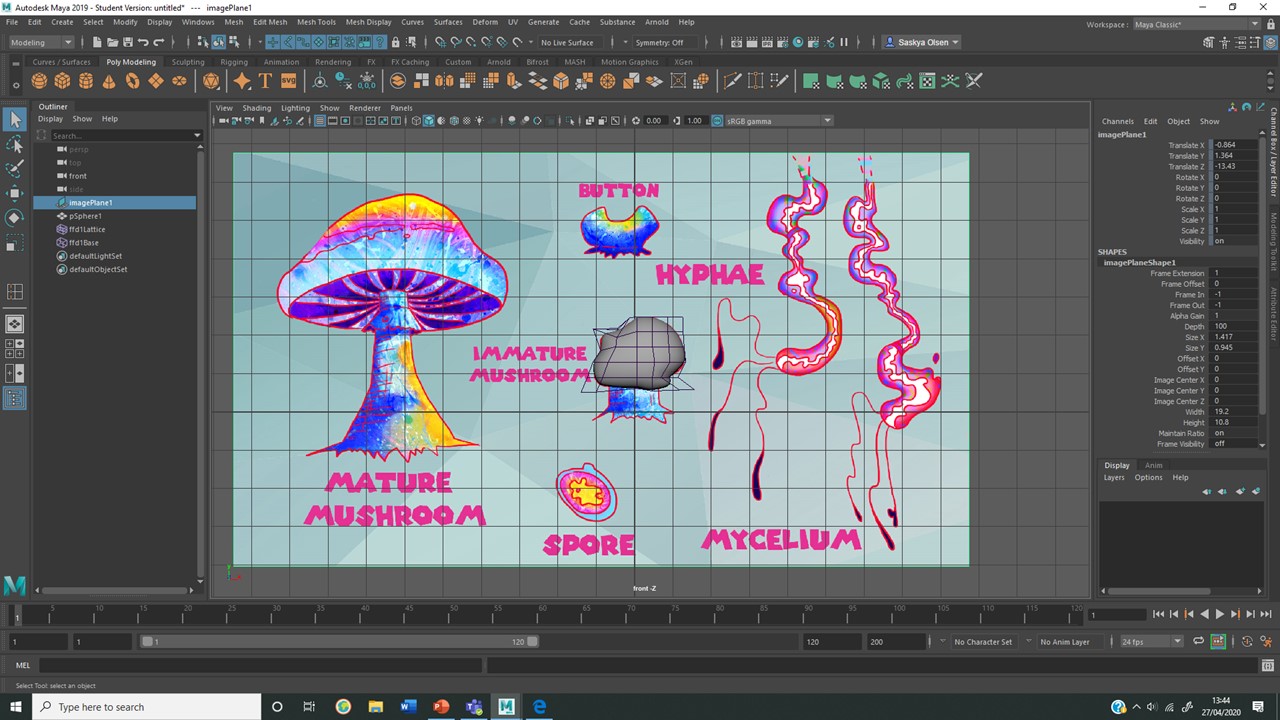
Fantastic Voyage - Modelling the Mushroom
Modelling the Button Mushroom
I Increased the subdivisions of my shape
to give me more modelling flexibility. However, I was unable to get the desired
effect of a ‘button mushroom’. I therefore restarted with a sphere.
From the sphere, I extruded some faces to
create the deformed cap of the button mushroom in my orthograph.
I manipulated the shape further by using
a lattice.
To complete the model, I created a
cylinder and formed a base. I used similar modelling methods to my tree
structure.
The edge loop tool allowed me to define
specific elements of my model, like the base.
Mapping this structure was simple. For
the cap, I unfolded the shape as a cylinder and made some cut adjustments.
There was limited texture stretching on
the stem of the mushroom model, which is good.
Modelling the Hyphae
I decided to model the hyphae as linear,
without the curvy positioning seen in my orthograph; this gave the best results
after I experimented with deformers.
With two hyphae, I can adjust their size
and movements to create many variations.
Modelling the Mycellium
I created a second set of modelled
hyphae, which will house the mycelium. These models demonstrate the fusing of
hyphae, which ultimately creates the mycelium (not yet visible).
I extruded a small patch of faces and
developed them into mycelium.
I hope to create a unique movement for
the mycelium that will separate them from the hyphae.
Finally, I mapped-out the uv’s. I
would like the mycelium to have a different texture to the rest of the
mycelium.
Modelling the Developed Mushroom
I began modelling the fully formed
mushroom by creating the ‘cap’, using organic and ununiformed geometry through
lattice deformers.
I closed the underside of the cap as a
base for the ‘gills’. The “fill hole” tool in the modelling tab was a useful
item to be aware of.
I used the multi-cut tool to define the
gills on my mushroom. I wanted this geometry to be simple, as this would
prevent UV mapping challenges.
Starting with a polygon cylinder, I
scaled the vertexes and edges to replicate the ‘stipe’ shape depicted in my
orthographs.
I created some interest by forming a
tendril-like base; cutting away at the cylinder with the ‘multi-cut’ tool and
then translating the vertexes.
The ‘edge loop’ tool enabled be to create
additional edges and helped to develop the base of the mushroom.
I was happy to discover the versatility
of the ‘extrude’ tool, which allowed me to extrude an edge loop, which I formed
into a ‘Volva’, a common characteristic of mushrooms.
Using a similar method to the base
tendrils, I translated vertexes to create a rippling edge to the ‘volva’.
I expanded on this ‘extrude’ discovery
further by applying the same method to creating an ‘annulus’.
The cap was relatively easy to map, using
a ‘spherical’ map and then creating extra cuts around the gills, a discrete
area.
Non manifold geometry was giving me
trouble when I came to map the mushrooms stipe and volva, I had to revert to
old save files and target the cause of the issue.
I simplified the base, removing the
tendrils. This was more successful to map and ‘non-manifolds’ were no longer an
issue.
The colour grids enabled me to register a
map as either successful or incorrect.
Modelling the Spore
I aimed to model three separate
components of the spore. This first layer will be opaque, enabling the viewing
of inner-layers.
This internal shape will hopefully be
visible when all materials have been assigned. I used lattices to create
irregular shapes, suggesting they’re organic and natural organisms.
This shape will sit in the centre of the
spore, I could potentially use a ‘sine’ deformer to create a small amount of
movement. I hope to give this piece of geometry a proper texture.
This image demonstrates the three layers
of my modelled spore.
Mapping the spore elements was very
simple. I didn’t map the exterior shape, as this only needs an opaque standard
surface.
Modelling the Basidium
I started modelling the basidium by
creating a basic polygon cube, adding subdivisions before scaling the shape and
removing the end faces.
I used the multi-cut too to create faces
that I could extrude into individual basidium. I also had the idea of Layering
them up for depth in the final animation.
I used the ‘circularize’ too to remove
any sharp edges and unnatural angles on my basidium.
I followed the same principles to fill
the cube with varying basidium.
I kept the mapping process simple by
separating all the components, which cancels out any texture distortion issues.
I then duplicated the model and re-saved
it. This allowed me to create a variation with developing spores on the end of
the basidium (only one is necessary for my animation).
Finally, I mapped the basidium model
again to accommodate for the new ‘developing spore’ holdings.


Comments